You are viewing an old version of this page. View the current version.
Compare with Current
View Page History
« Previous
Version 17
Next »

http://spark.apache.org
How to create an instance of Spark Cluster in the KASI Science Cloud
- Step 1 : Choose a spark cluster template
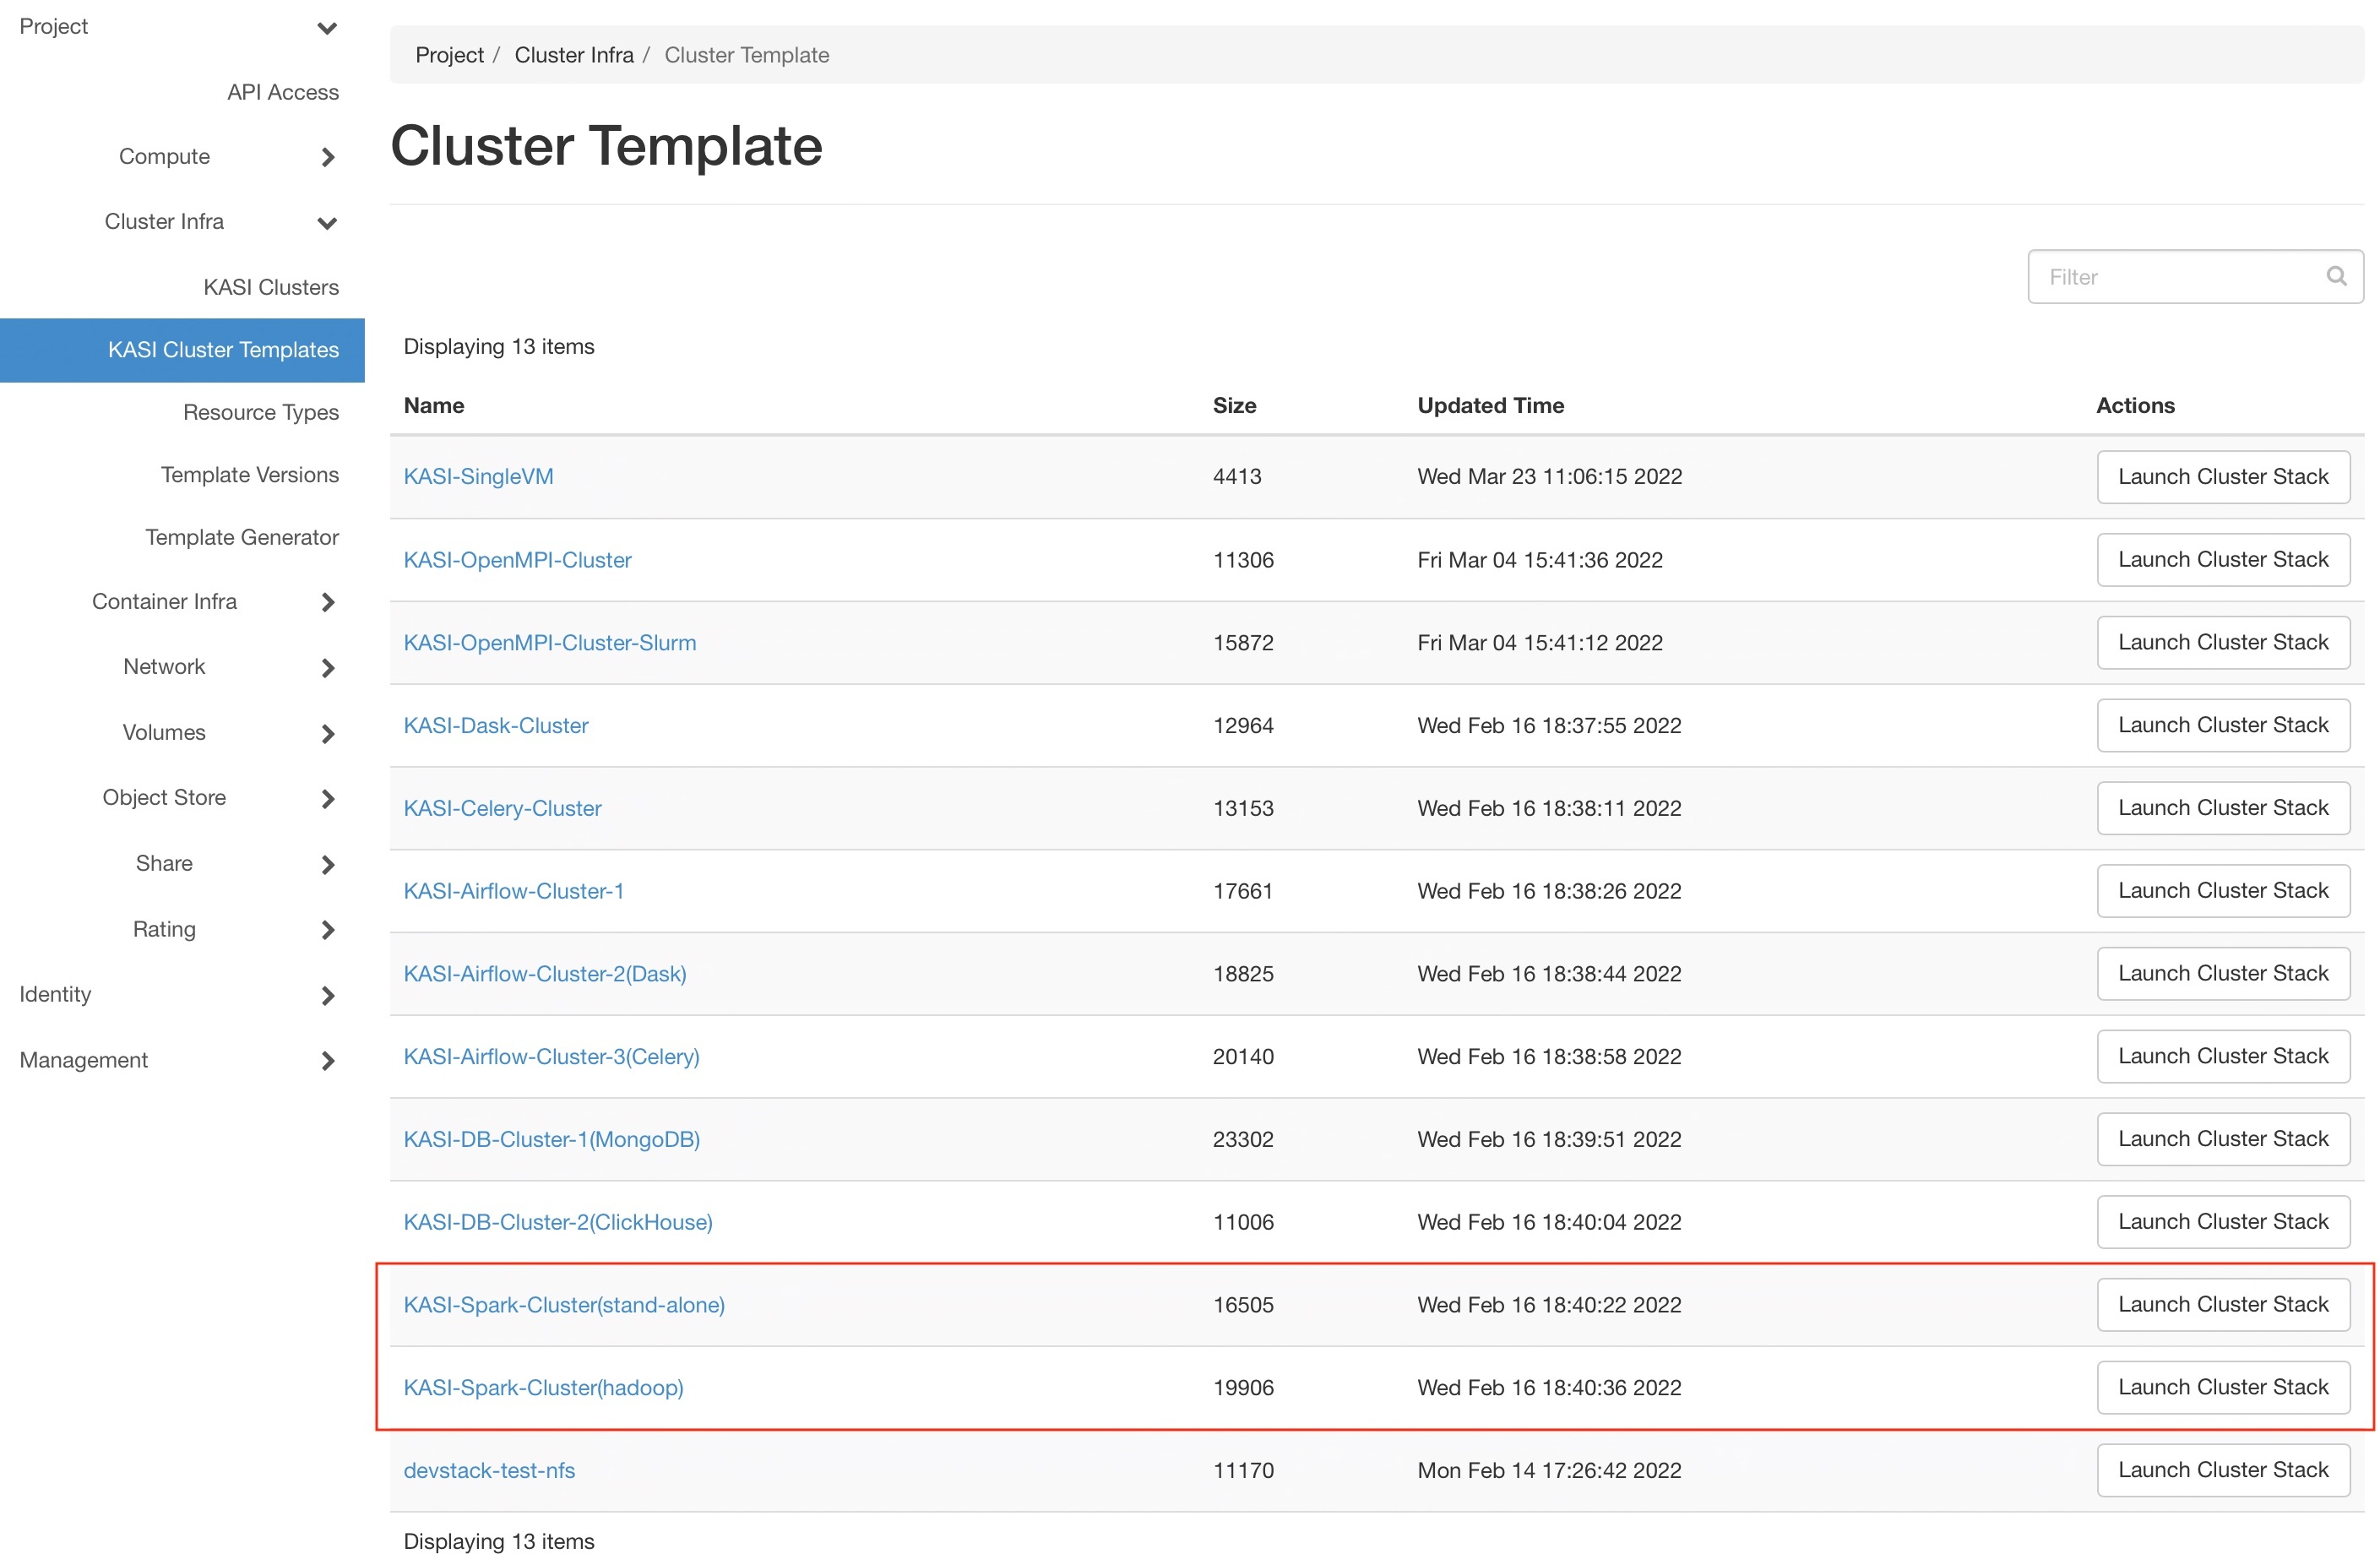
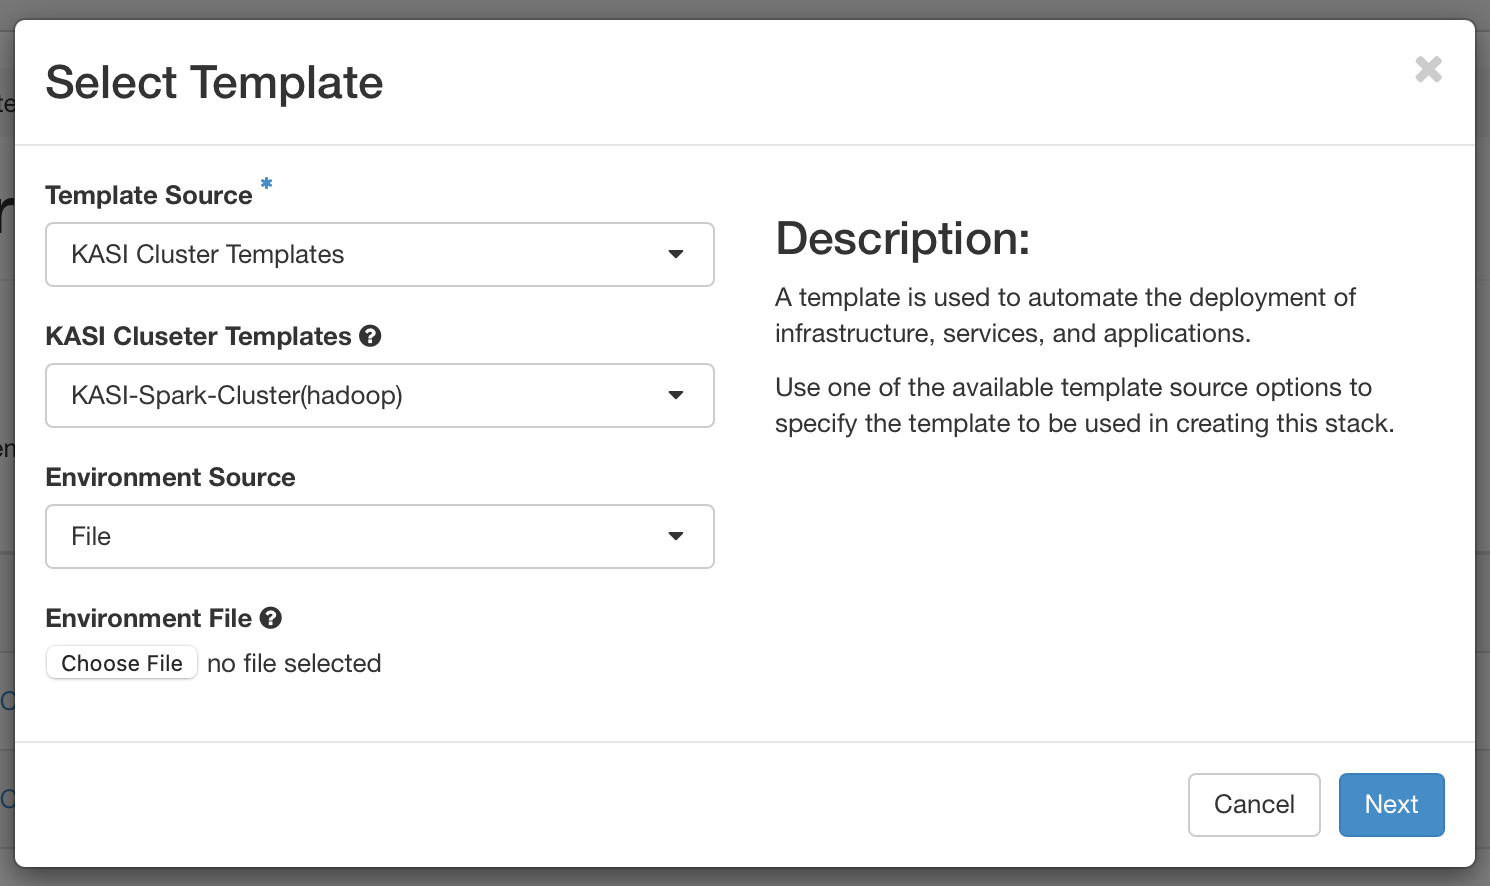
- Step 2 : Use the default settings in most cases
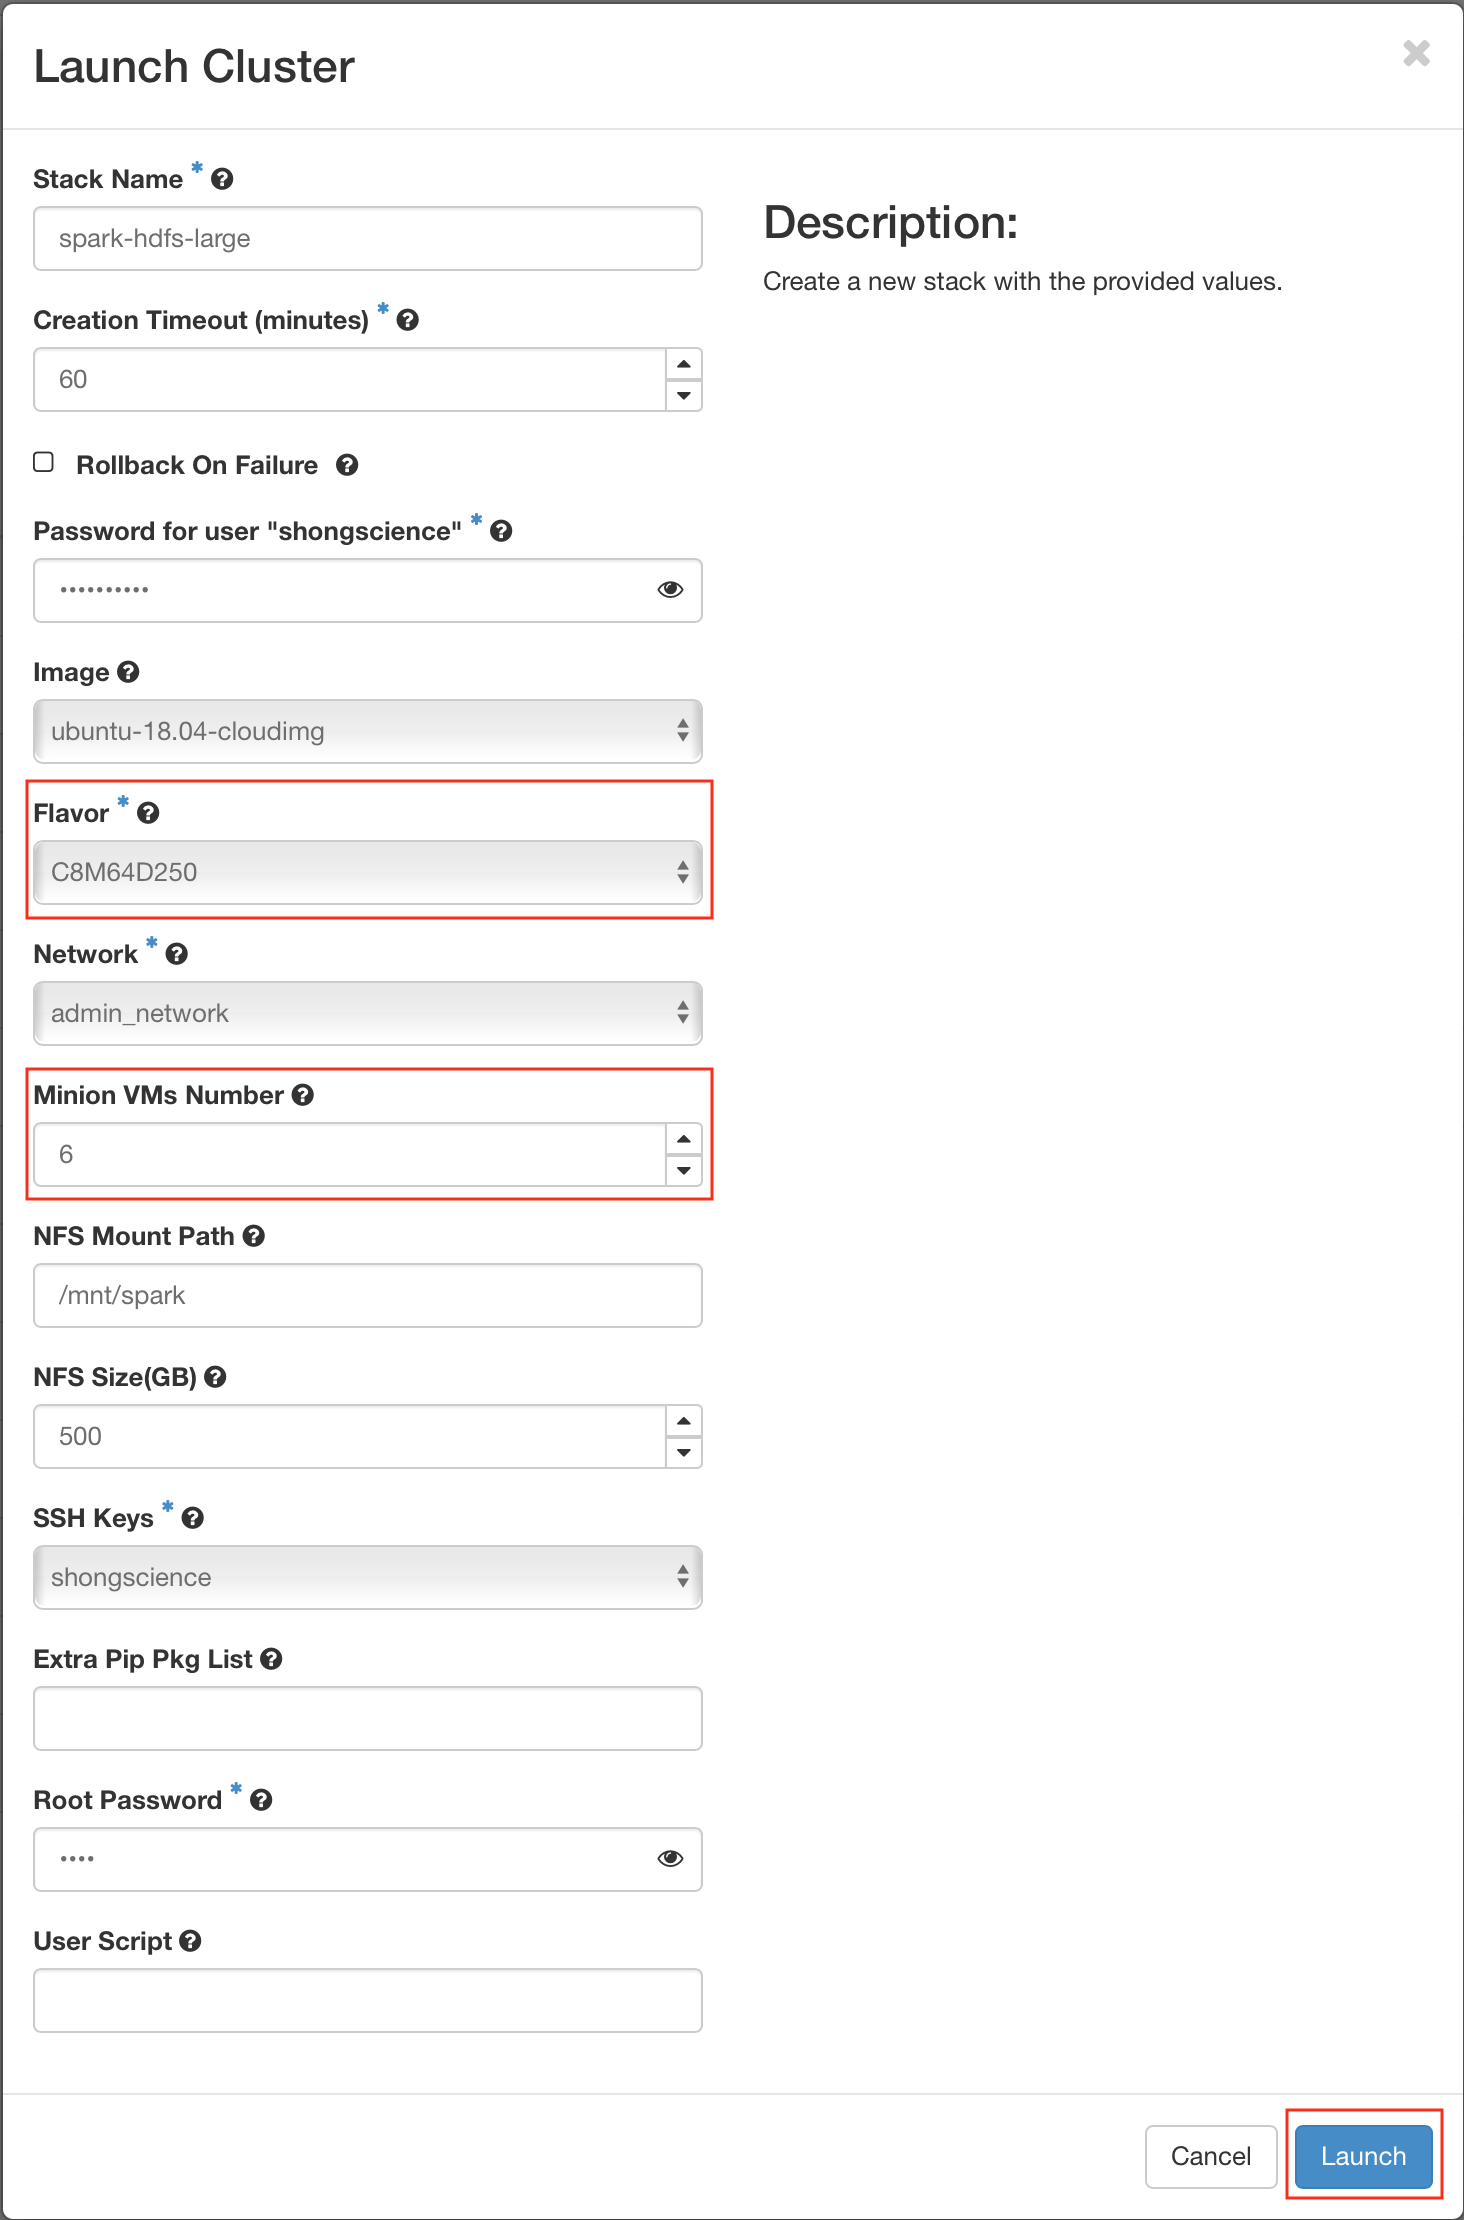
- Step 3 : Choose a flavor and Set the number of slaves (minons), then Create
Connect to the Master-Node and Run some basic scripts
- root 으로 접속 후, nfs 디렉토리로 이동
alias 를 확인해보면, allon 과 alloff 명령어를 볼 수 있음. 이 명령어로 Spark+Hadoop Cluster를 Star/Stop 할 수 있음.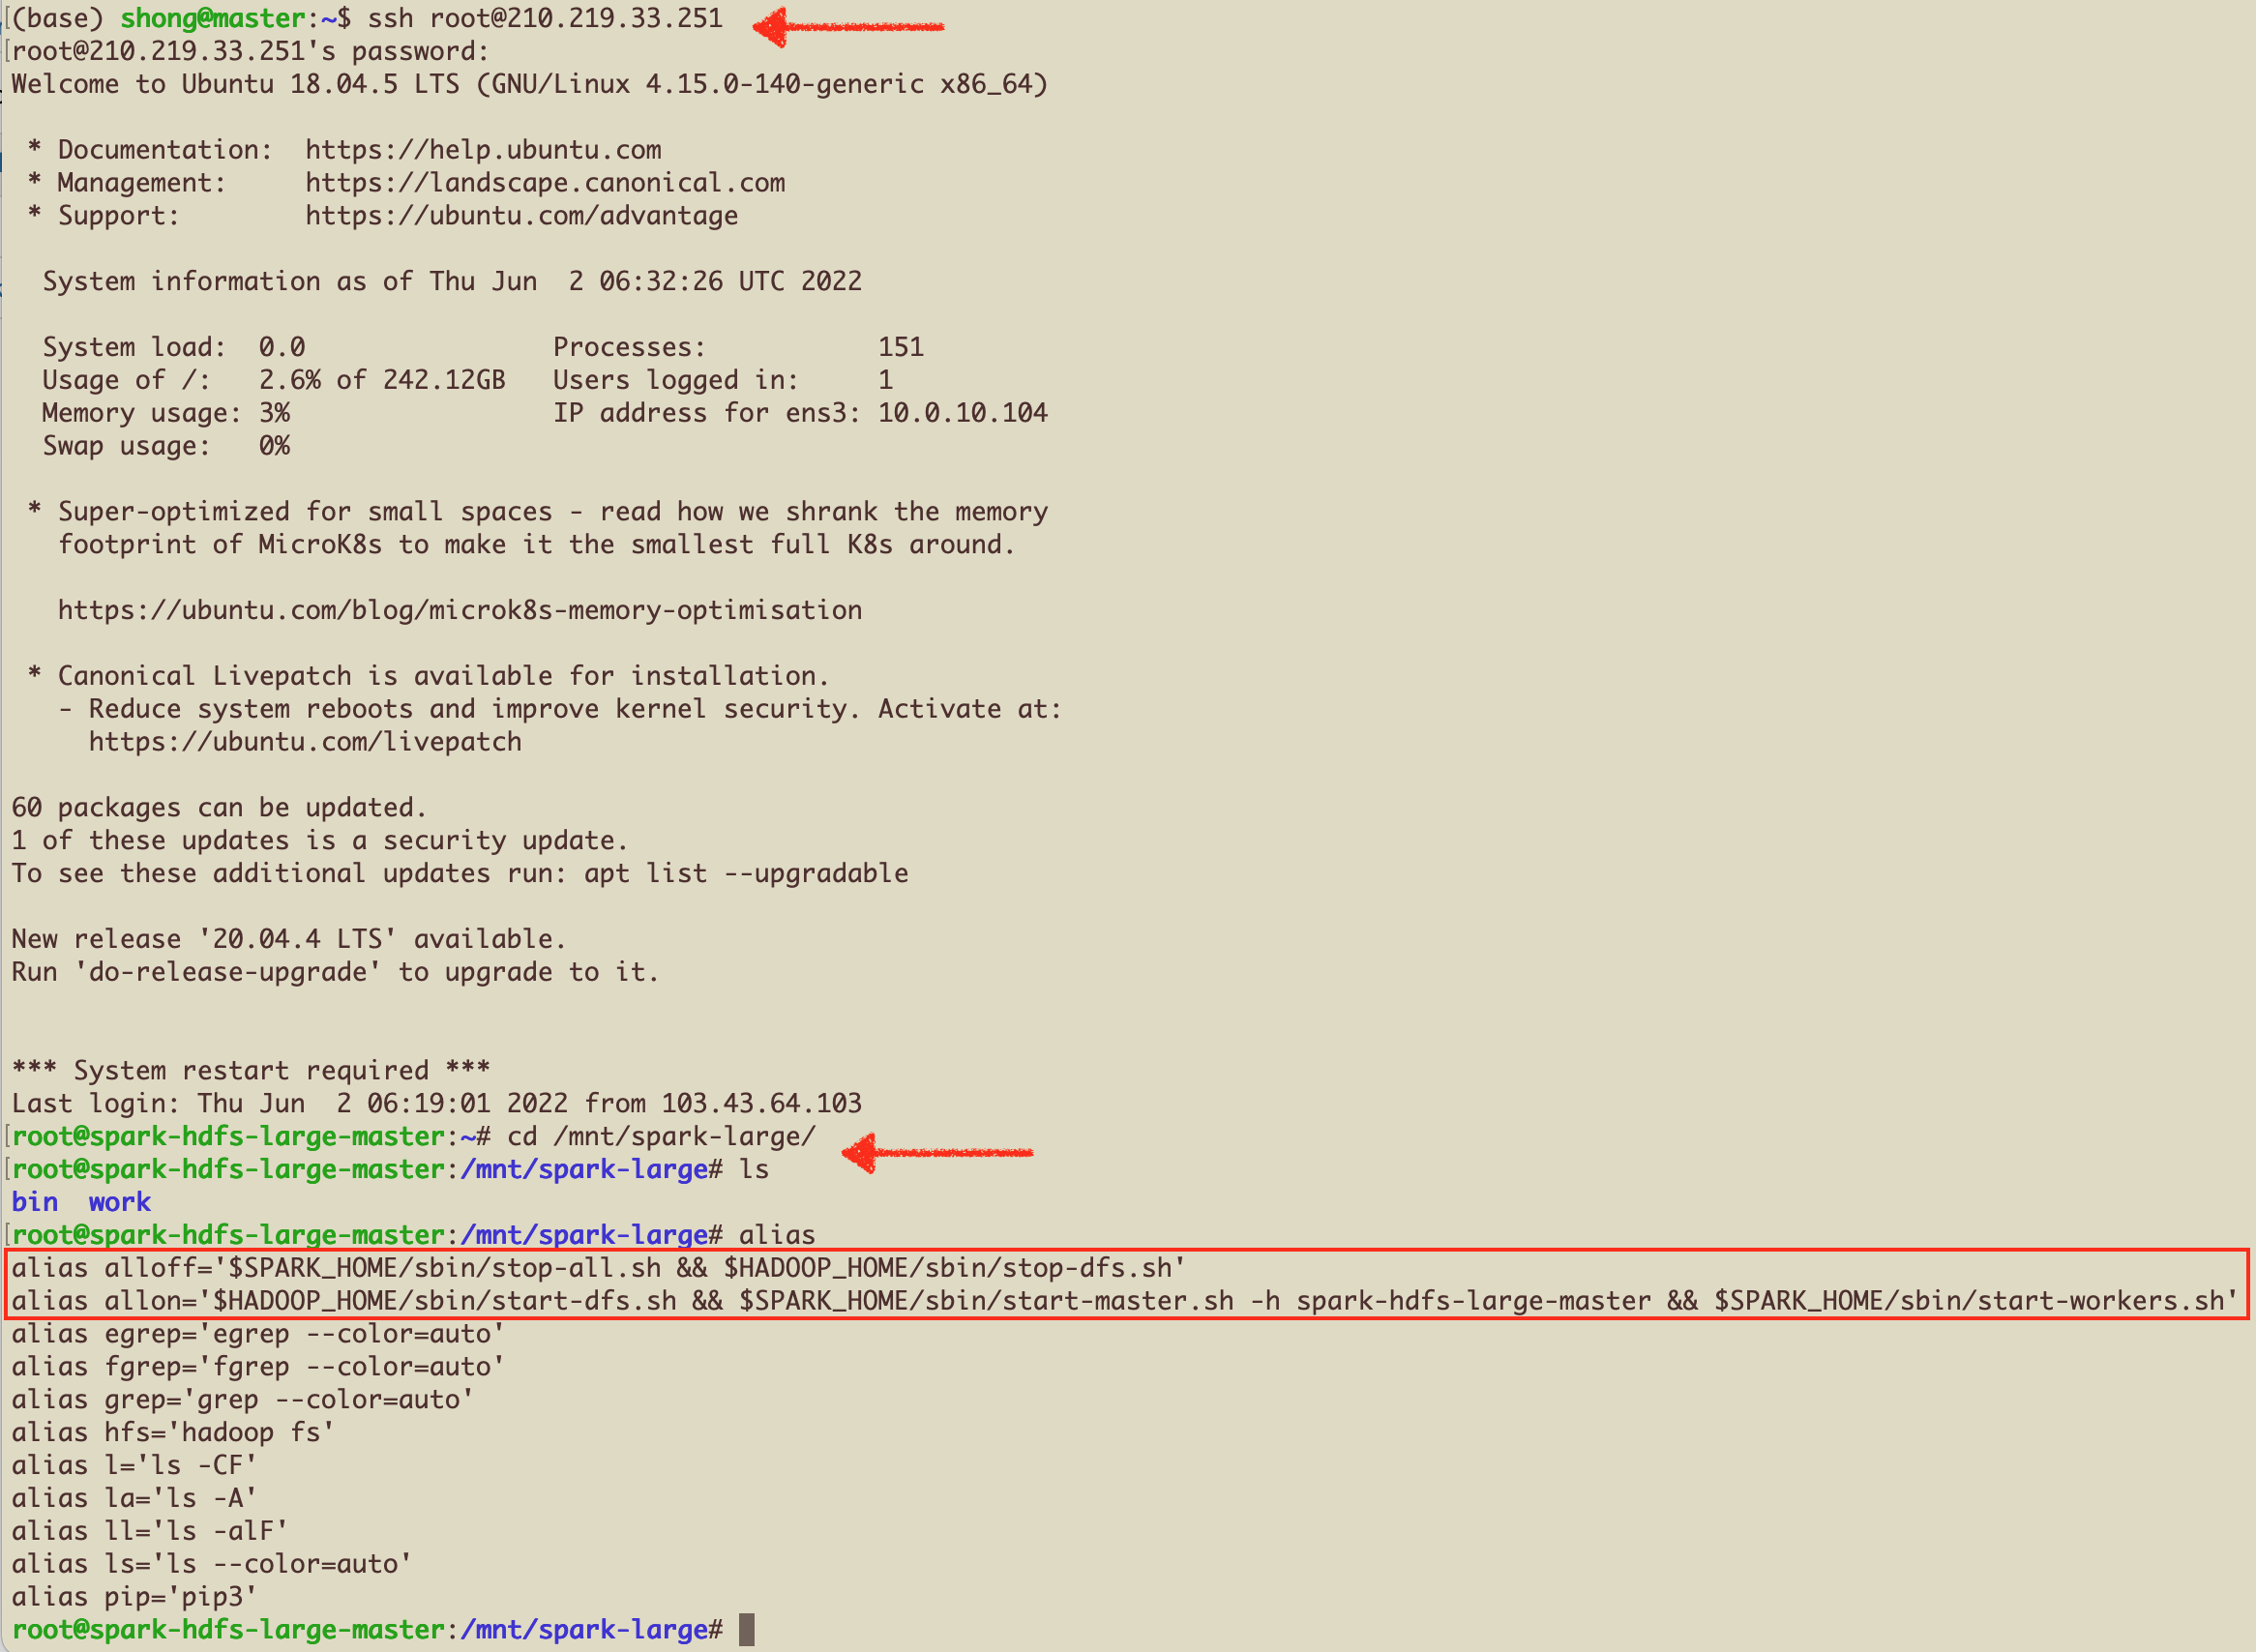
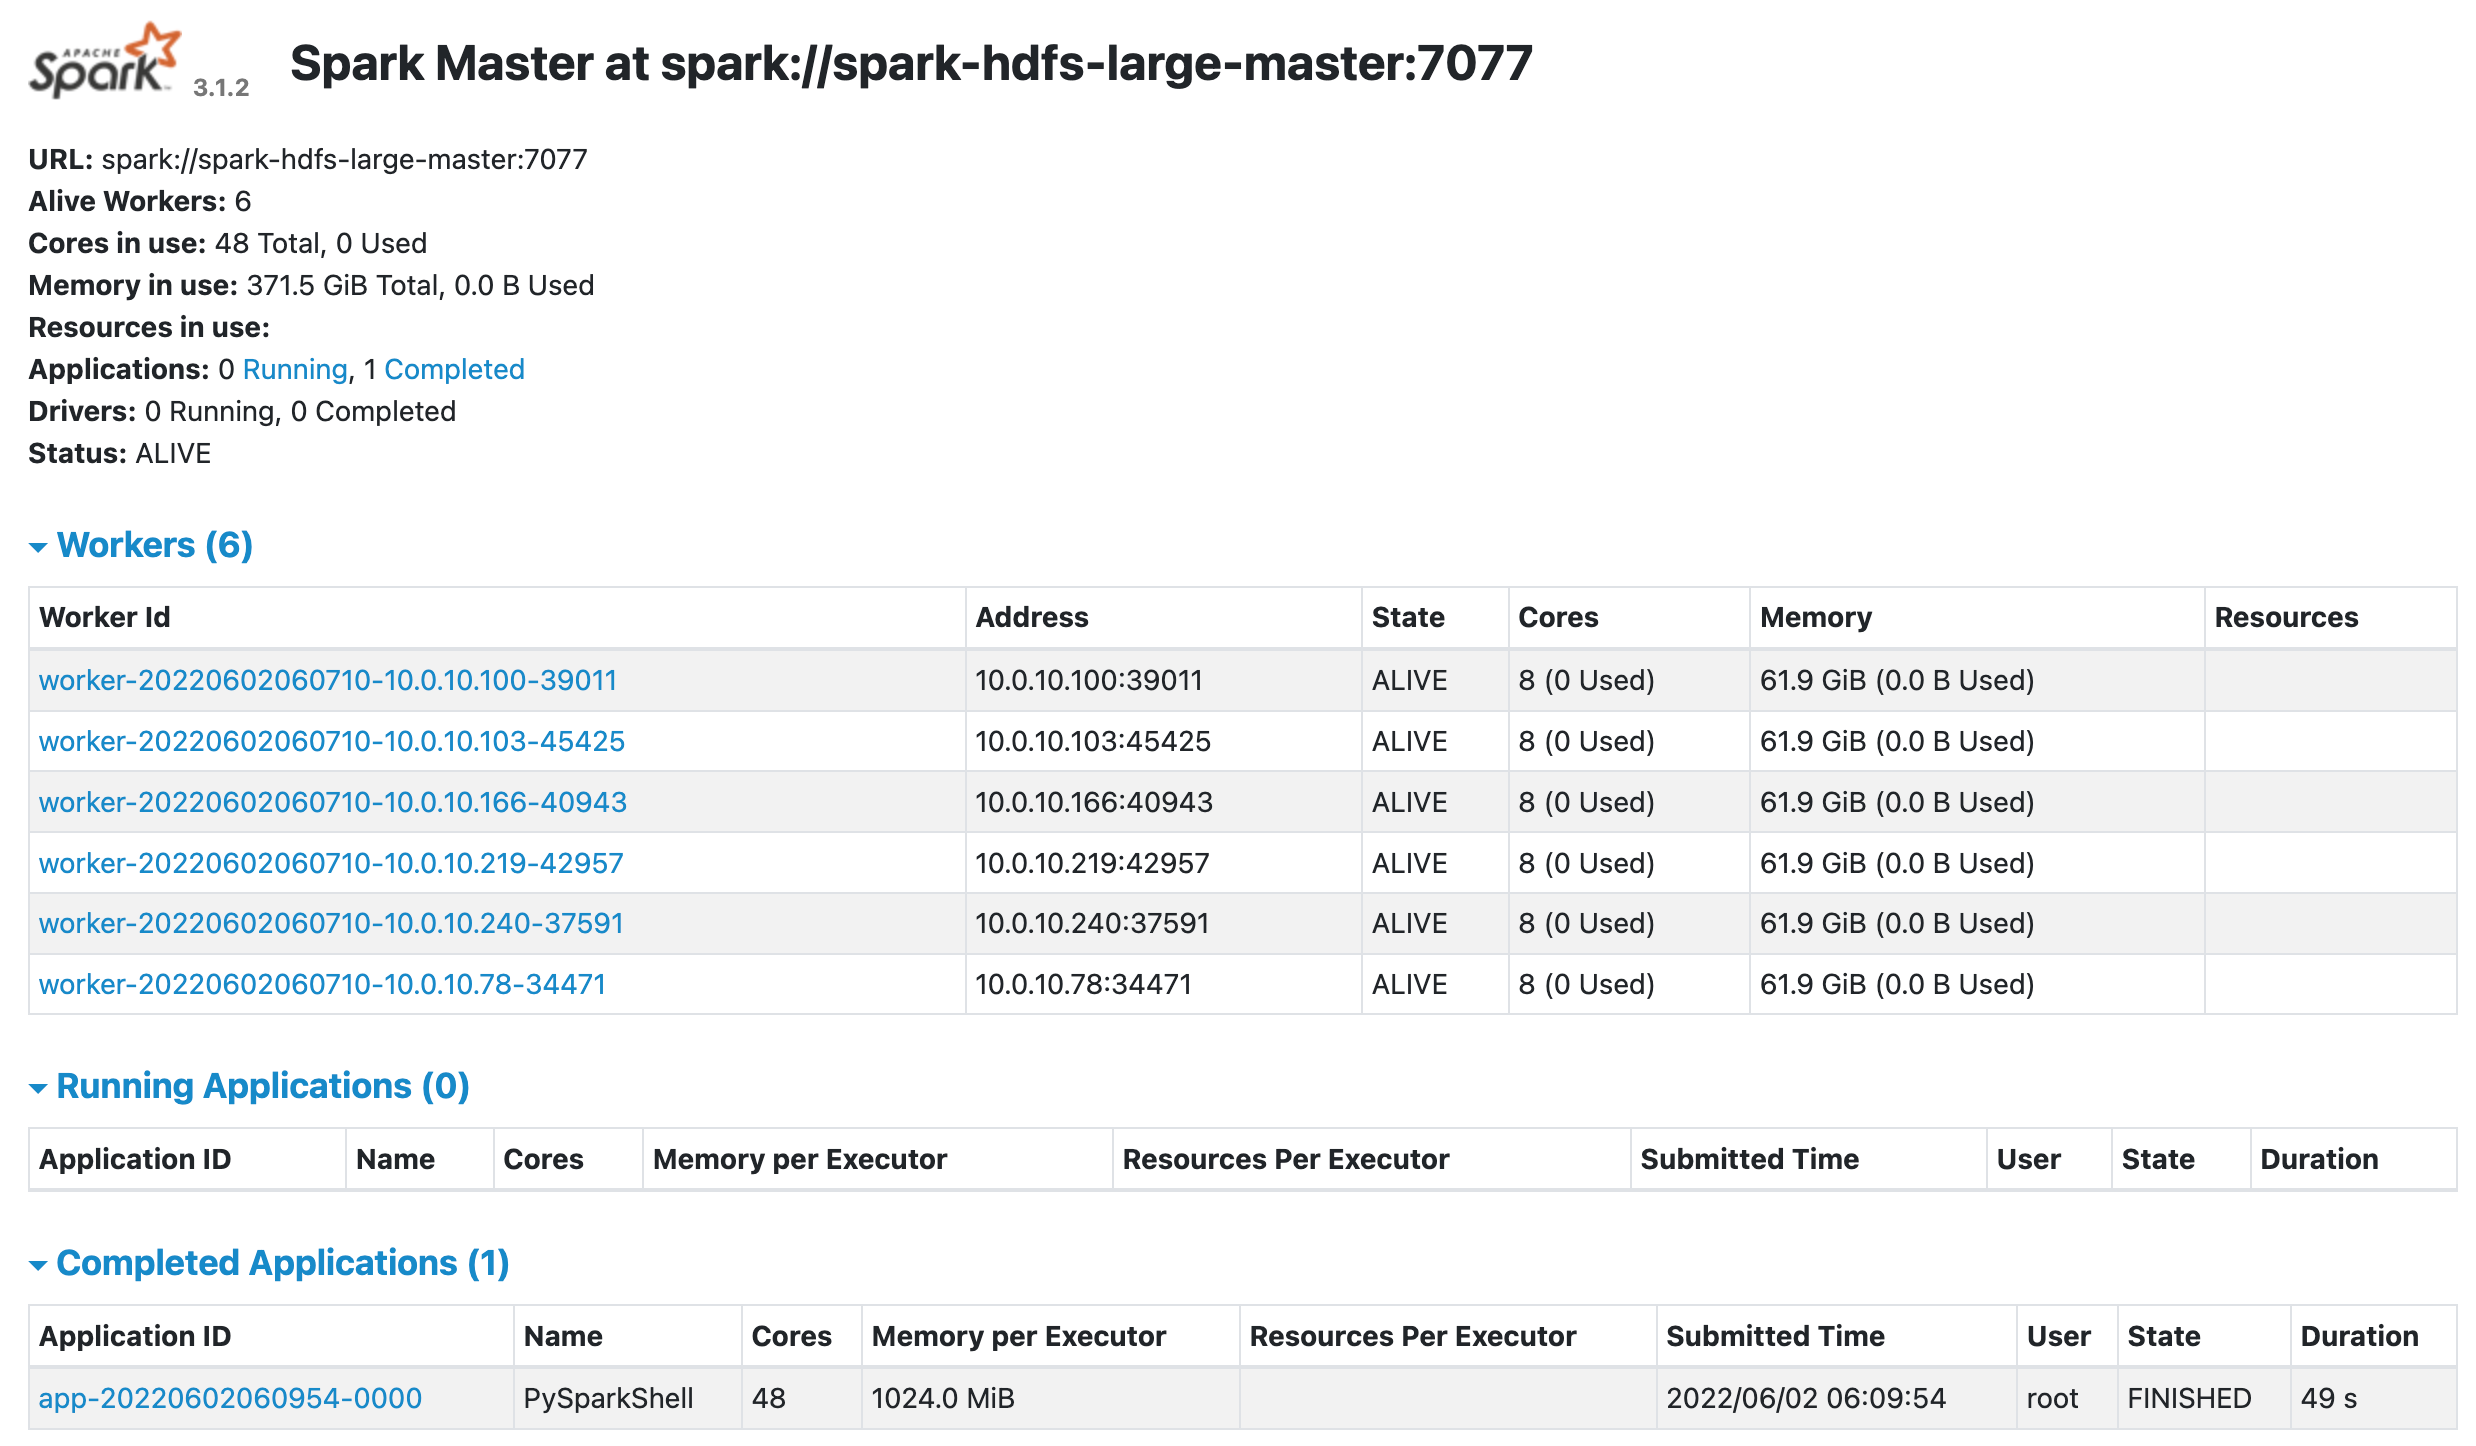
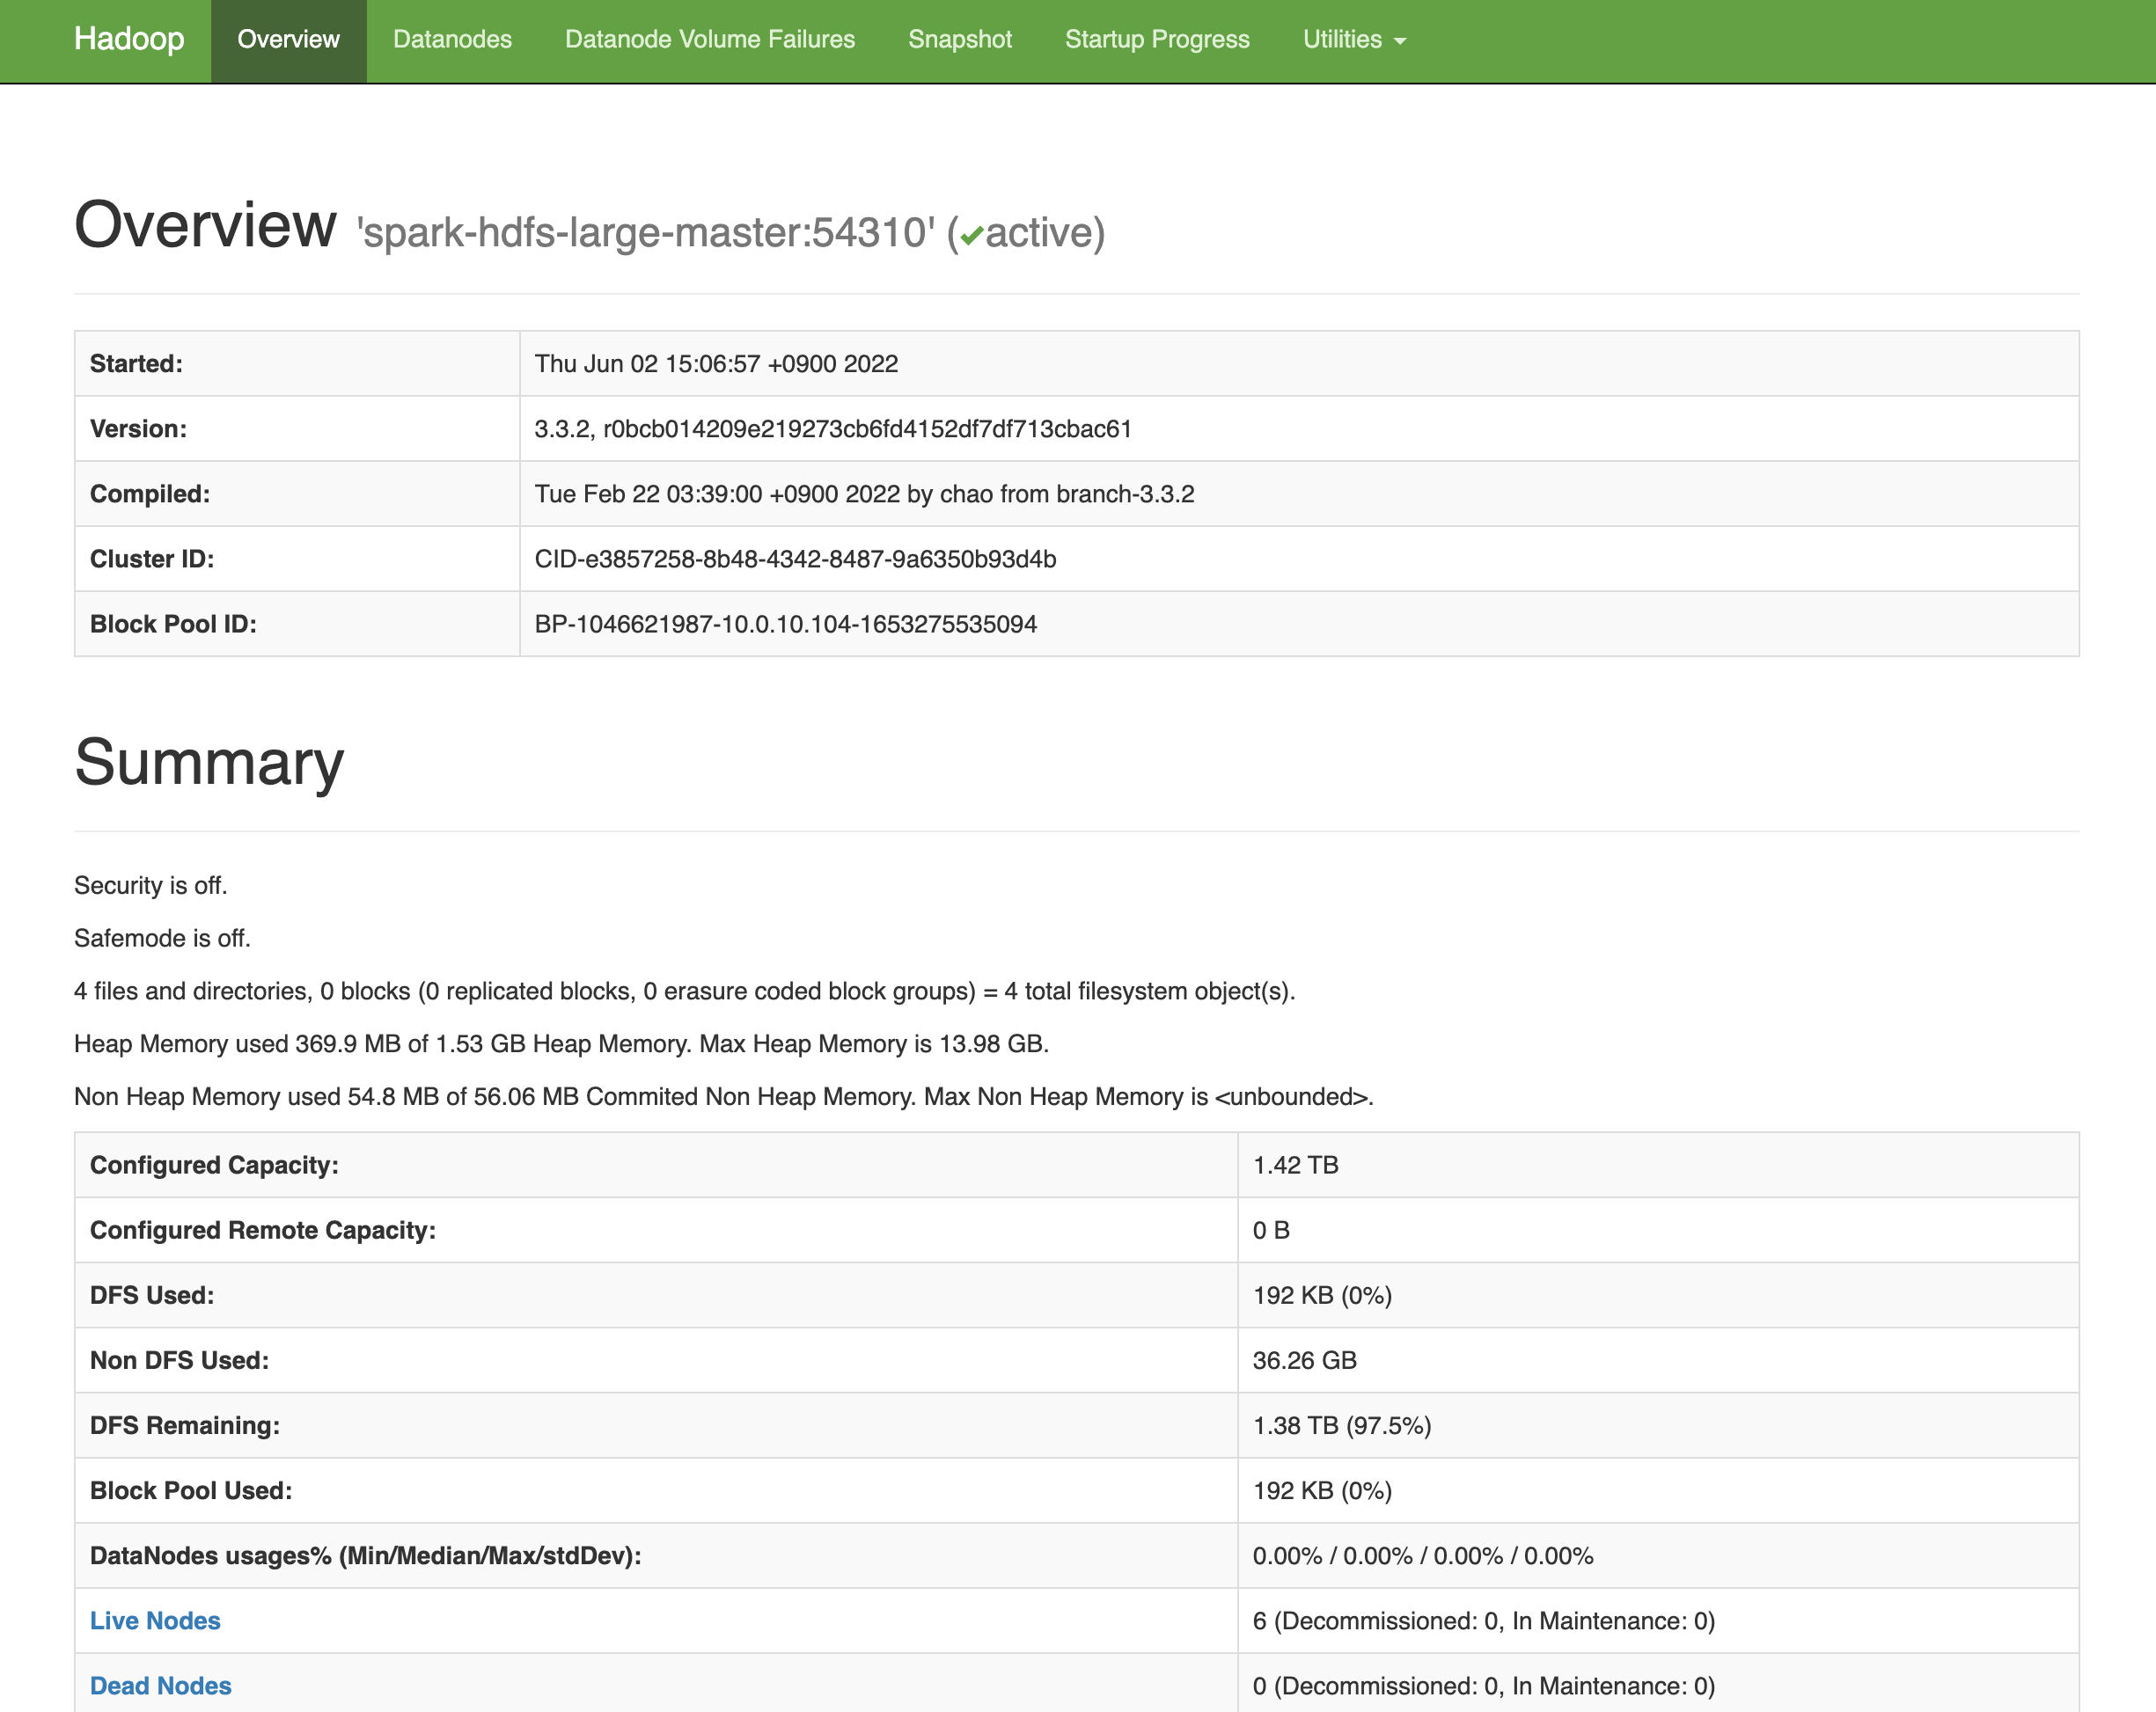
allon 이 제대로 실행되었다면, http://master-node-ip:8080 와 http://master-node-ip:9870 에서 Spark와 Hadoop의 WebUI를 볼 수 있음.
여기까지 설정이 끝났으면, spark-submit 을 이용한 script 실행이 가능함. Jupyter Notebook을 이용한 interacitve shell mode를 이용하려면, 아래 설명한 추가 설정이 필요함.
SparkUI
HadoopUI
- 여기까지 설정이 끝났으면,
spark-submit 을 이용한 script 실행이 가능함.
Introduction to Apache Spark